Monday, 30 March 2015

Thai green curry mussels

This past weekend Craig and I were craving seafood, mussels in particular, so off we went to our local fishmonger...We got  us some West coast mussels. The difference between East and West coast mussels is that west coast mussels are larger in size and they don't shrink up as much when they are cooked. Either way, they were delicious. We normally cook them in a white wine or tomato based sauce, but we were in the mood for a richer/creamy sauce.  Naturally, when I want something rich and creamy I tend to go to coconut milk...so thai green curry mussels it was. Now, this sauce is the basic sauce I would use for a chicken curry as well (I use green beans and cauliflower for veg).

What you will need...
Serves 2-3
1 1/2-2 lbs of fresh mussels (scrubbed and debearded, if necessary)
1 tbsp of coconut oil (or oil of your choice)
1 can of coconut milk
1 tbsp of Thai green curry paste
1 garlic clove, minced
1 tsp of fresh ginger, chopped finely
1-2 Thai chillies, chopped finely
1 stalk of lemon grass
1 kefir lime
2 tsp of fish sauce
chopped cilantro and lime for garnish (optional)

How to prepare it...
Cut the bottom 1/3 of the lemon stalk into one inch  pieces.Crush the pieces with the flat side of chef's knife.
In large, heavy bottom sauce pan or wok over medium heat add the coconut oil and fry the garlic, ginger and chillies until fragrant (1-2 minutes).  Stir in the Thai green chilly paste and cook for an additional minute, so that it releases its oils. Stir in the coconut milk. 
Add in the lemon grass, kefir lime and fish sauce. Simmer for 5-10 minutes.
Discard and open mussels that do not close to the touch, increase heat to medium-high and add the mussels.  When a few start to open, cover the pan/wok and cook for 5-7 minutes (or until remaining mussels have opened).
Transfer mussels to bowl/s, discarding any that have not opened.
Ladle the broth over the mussels and garnish with chopped cilantro and fresh lime.


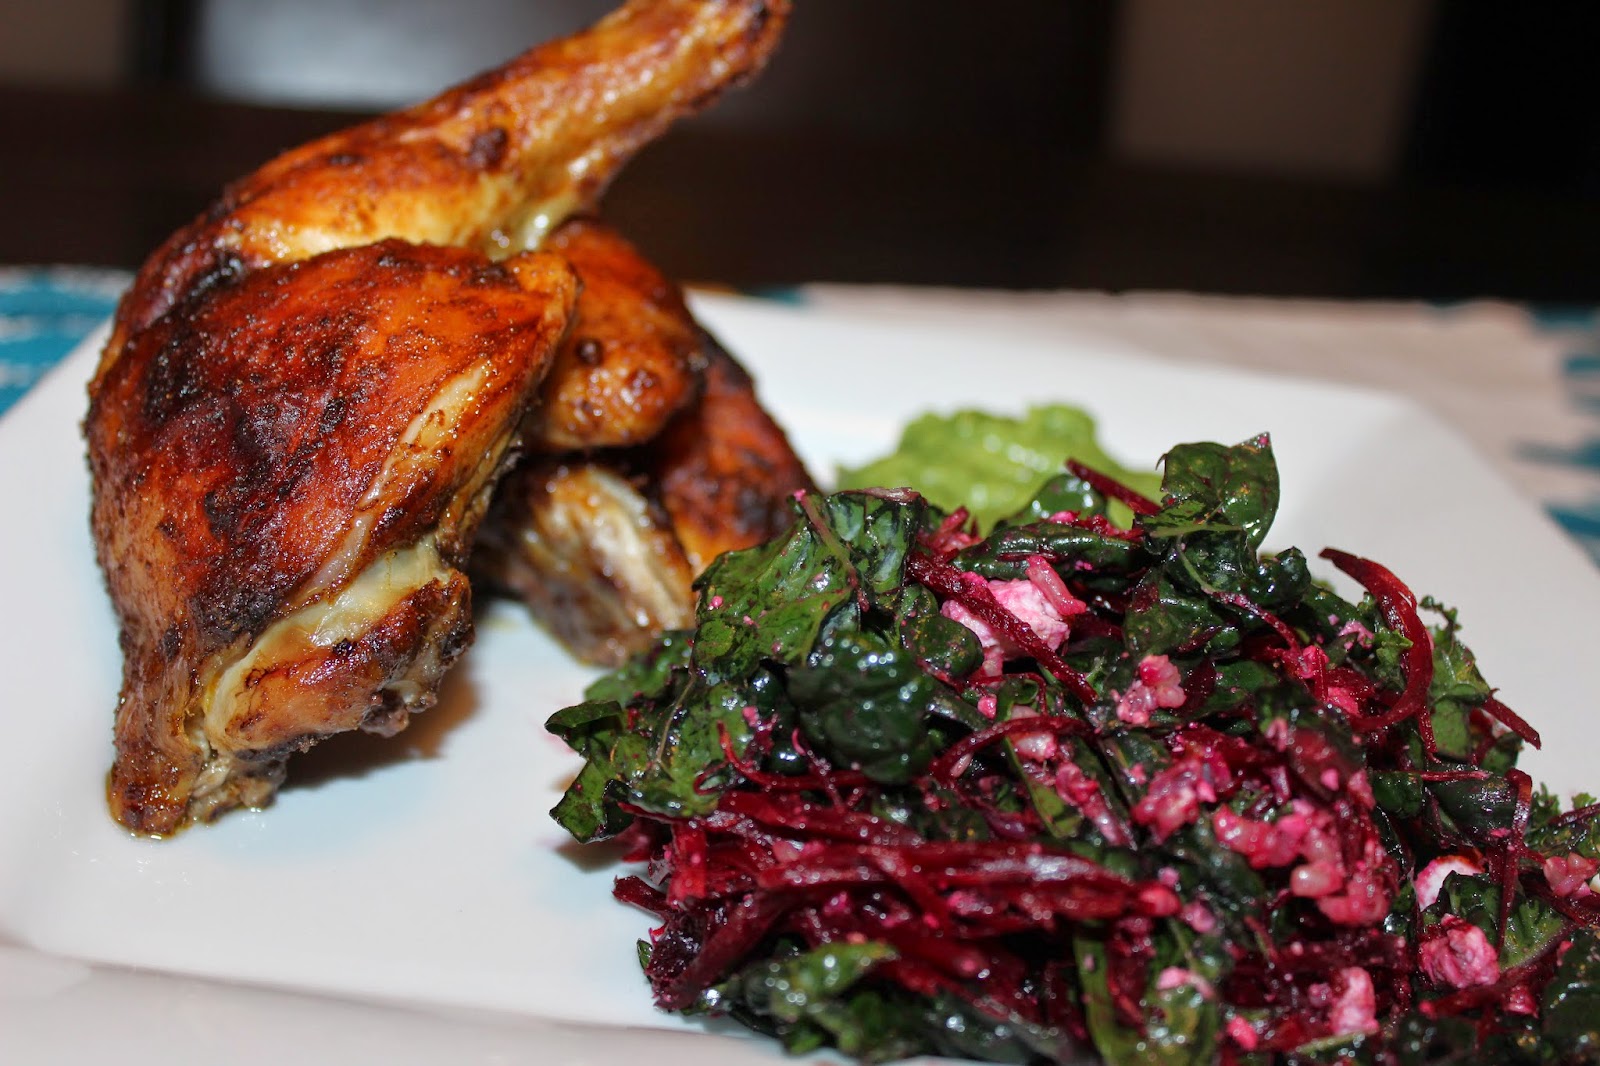
Roasted Chipotle Chicken with Peruvian Green Chilly Sauce

 
This is a staple weekend or week night dinner in our house, particularly in the summer, over the charcoal BBQ. Since the weather is not cooperating up here in the north, and it will be a while before we can get the BBQ out, I have concluded that I need to make this chicken....even if it's in the oven.  The chicken has a fragrant sweet and smoky flavour and the the Green Chilly Sauce is to dye for! If there are any green chilly sauce left overs I like to put it on my scrambled  eggs  in the morning!

What you will need...
One free range chicken

For the rub
2-3 tbsp of olive oil
2 tsp of coarse sea salt
1 tbsp of smoked paprika
2 tsp of chipotle pepper
1 tsp of ground cumin
1 tsp of ground coriander
2 tsp of garlic powder
1 tsp of brown sugar
zest of one lime

Peruvian  Green Chilly Sauce/Aji verde

3 jalopeno peppers, stemmed, seeded and chopped
1 pablano pepper, roasted 
2 garlic cloves, minced
1/2 bunch of cilantro
1/3 cup of fresh mint
1/3 cup of fresh basil
juice of one lime
1/2 cup of mayonnaise (I make my own, it is super easy and much, much better for you) or you can use 2 avocados if you want to avoid the fat
1 tsp of apple cider vinegar or white vinegar

How we make it...
Wash the bird and pat dry. Split it (I use my kitchen shears and cut out the spine). 
Mix all the rub ingredients in a small bowl.
Rub the chicken all over with the rub. Cover it and let it marinate over night or a minimum of  6-8 hours.
I like to take the chicken out of the fridge for 45 min. to one hour before putting it in the oven.
Preheat your over to 400F.
Cook chicken in the oven for about one hour, or until the meat cooked.  This skin will be nice and crispy! 

Doesn't that look good!!!

For the Green Chilly Sauce...
While the chicken is in the oven (or before) add all the ingredients in a blender/food processor and blend and that's about it :)
Easy, peasy :)
Here, I served it with black kale and fresh beets salad with feta!

Sunday, 22 March 2015

Tom Yum (Hot and sour) Soup

This was not really intended for the blog and was a spur of the moment dinner idea. The pics were taken with my phone, so the quality is not great. 
What I can guarantee you though, is that the soup is fan-freaking-tastic!
Tom Yum soup is a Thai clear, spicy and sour soup. It is the first Thai dish I tried, over 17 years ago, which ignited my love for Thai food.  The broth is made with lemon grass,  keffir lime leaves, galangal, tom yum paste, fish sauce and thai chillies.  It's the perfect soup, in my humble opinion.  I like to add a variety of mushrooms to it, as well as shrimp, thai eggplant, bean sprouts and vermicelli noodles. For garnish, use thai basil, chopped green onions, and cilantro.

Here is what you  will need...
4+ servings

3 cups of fish stock
4 cups of chicken or veggie stock
6 tbsp of fish sauce
3 thai chillies
2 stalks of lemon grass, cut into 2 inch pieces and crush pieces with the butt of knife to release oils
4 keffir lime leaves, roughly torn
1 inch piece of galangal, cut into slices
4 tbsp of tom yum soup paste (you can find it in Asian food stores)
2 tsp of palm sugar (or brown sugar)
2-3 roma tomatoes, cut into thick slices/wedges
1 cup of sliced button mushrooms
1 cup of enoki mushrooms
20-25 medium size shrimp, peeled
5-6 thai eggplants, sliced
2-3 cups of bean sprouts

Garnish
Thai basil
Cilantro
Chopped green onion
Fresh lime
Extra enoki mushrooms (optional)
Vermicelli noodles (optional)
How we make it...
Add stock, lemon grass, kaffir lime leaves, galangal and chillies  to a pot and bring to a boil. Simmer for 15 minutes.  Add tom yum paste, sugar, fish sauce, shrimp, mushrooms, eggplant, bean sprouts and tomatoes. Cook for further 10 minutes. 
If you choose to add vermicelli noodles, cook as per instruction on package, separate from soup.
Garnish soup bowl as listed above, add soup and a squeeze of fresh lime and go to your happy place:)

PS You don't eat the lemon grass stalks, keffir lime leaf or galangal. It's ok to pick it out of the bowl as you eat it.


Monday, 9 March 2015

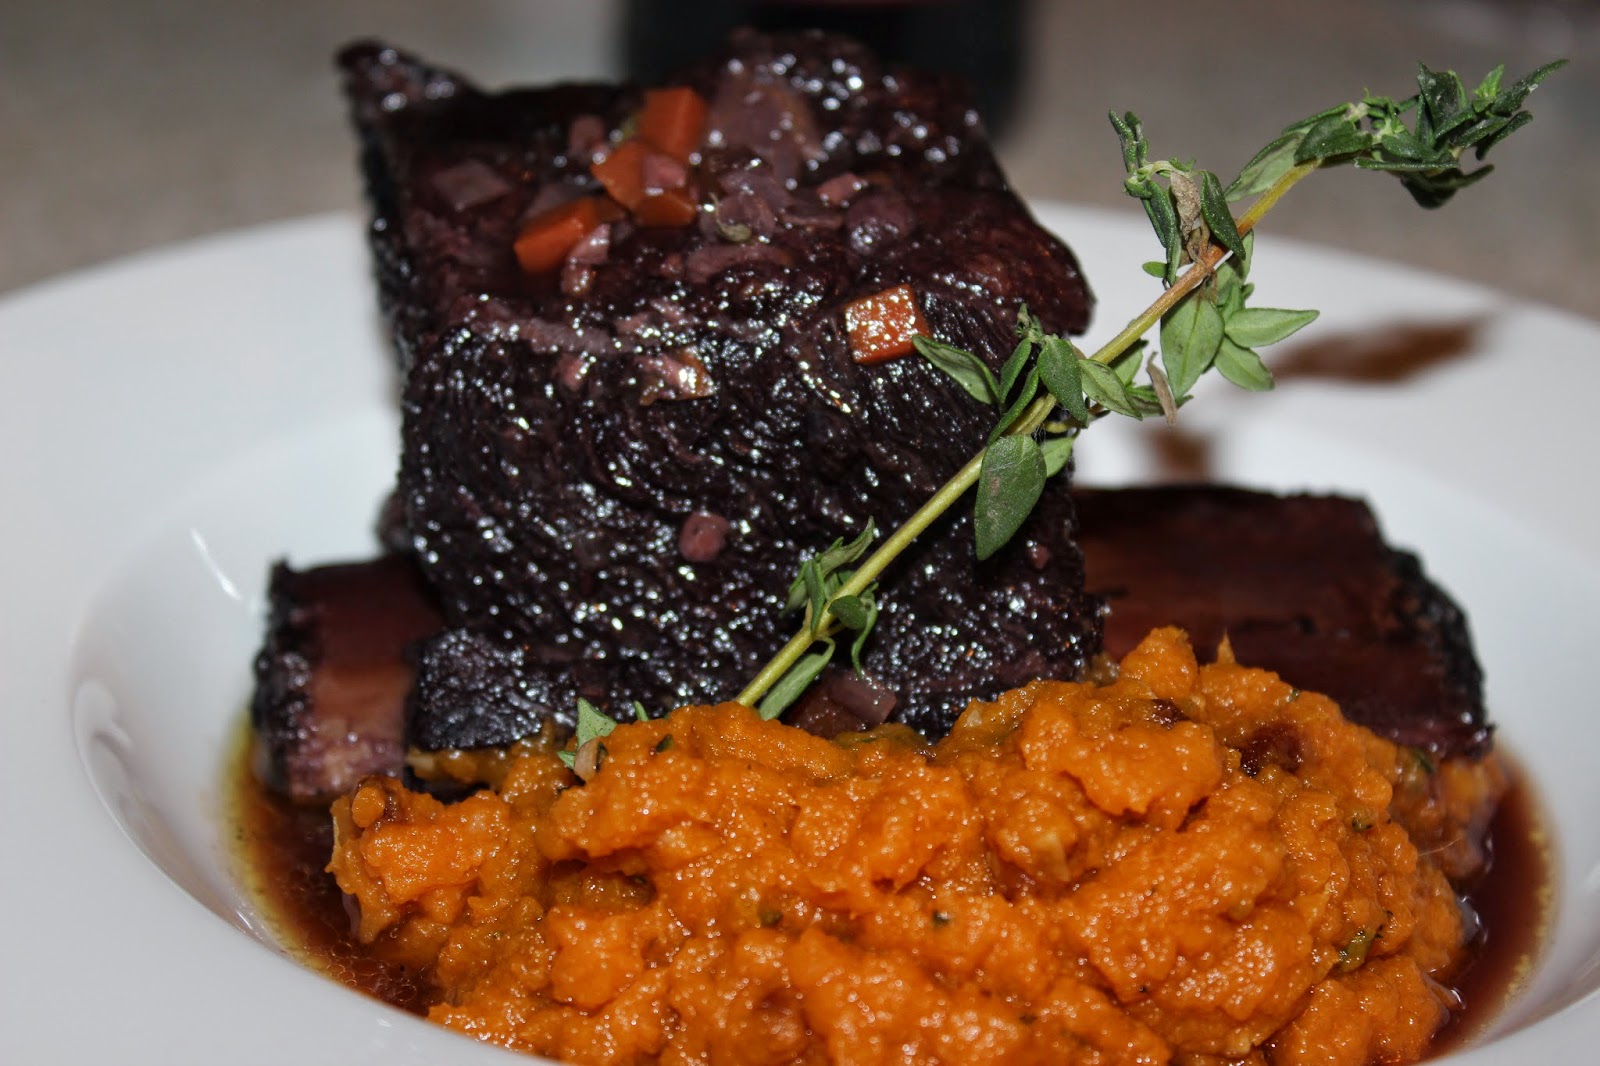
Red Wine-Braised Short Ribs with Garlic Sweet Potato mash

We went to Wholefoods this  past Saturday to get some sweet potatoes (they have all types of sweet potatoes there, Japanese, Hannah, Garnet, Purple etc). While cruising the store we walked by the butcher/meat section and boy, oh boy....did the short ribs look good.  So, it took just a second to decide what's for dinner....:)

So here is a little 411 on sweet potatoes:
Your grocery store tends to sell the orange sweet potato or often called yams. The orange fleshed sweet potatoes are usually softer and sweeter when cooked. This makes them a great candidate for mashing and stuffing.
The other varieties,  like the Japaneses (purple skin and butter coloured flesh) and the purple skin and flesh ones  are drier and starchier, which makes them a good candidate for potato hash, scalloped or roasting.

What you will need...(two servings)

For the meat:
Two  5-inch-long beef short ribs
1 large carrot, finely chopped
1 celery rib, finely chopped
2 small shallots, chopped
2 garlic cloves, chopped
1 tbsp of tomato paste
2 sprigs of fresh thyme
1 bay leaf
2 cups of a full bodies red wine (like a Cab. Sauv. or Syrah)
2 tbsp of oil

For the sweet potato...
2 small- medium size sweet potatoes (orange flesh)
1 tsp of fresh thyme(or rosemary), chopped
1 tbsp of butter
2 tbsp of olive oil
2 small garlic cloves, minced

For the ribs...
Preheat oven to 325F.
Heat the oil in a Dutch oven over medium high heat.
 Season the short ribs with salt and pepper,
and sear in the hot oil on all sides until well browned, about 8-10 min.  Be patient with this step, it is key to brown the meat well.


Remove the short ribs from the pan.
Turn down the heat to medium and add the carrots, celery, garlic and shallots to the pot. Cook until soft, about 7-8 min. Stir in the tomato paste. Cook for an additional 2 min.
 
Return the short ribs to the pan, add in the thyme, bay leaf and wine. The ribs should be almost covered in liquid. If you don't have enough, add some more wine, water or beef broth.
Bring to a boil. Cover and bake in the oven for 2 1/2 hours.
 

For the sweet potato mash...
Preheat oven to 400F
Scrub  and dry the sweet potatoes and place on cookie sheet in the oven and bake for 45-60 min.
Tip...you will know they are done when they start oozing juice onto the baking sheet
Take out of the oven and let them cool, 5  minutes or so, or until you can handle them.

In a small sauce pan, over medium heat, sautee the minced garlic in the olive oil until fragrant and golden (3-4 min).  Remove from heat.
This step gives the sweet potatoes a roasted garlic flavour. YUM!
Remove the peel from the potatoes (it should peel right off).

Using a potato ricer (what I like to use), masher or hand-held mixer mash/whip the potatoes.
Season with salt and pepper.
Mix/Whip in the butter, thyme, garlic and olive oil mix.
Taste and adjust salt and pepper seasoning if needed.


Monday, 23 February 2015

Easy and Delicious Black Forest Cake

This is one of my DH favourite cakes and as it turns out my kids enjoyed it quite a bit,  which is a miracle because our kiddos do not eat cake. The cake is not as per the authentic Schwarzwald Kirsch Torte, but that makes it easier to prepare and still enjoy the flavour of Black Forest Cake.

What you will need...

1/2 cup of flour
1/4 cup of good quality cacao powder
 3 tbsp of butter, melted (skim off the white solids on top)
6 eggs, at room temperature (if you forget to take out your eggs, just put them in a bowl of warm  water for 10-15 min)
pinch of salt
1 tsp of vanilla
3/4 cup of sugar

4 cups heavy whipping cream
1 cup of powdered sugar
2 tsp of vanilla

2 cups of pitted cherries, I used frozen black cherries
1 can/jar, 19-24 oz of sour cherries in syrup, if you can not find that you can use regular cherries in light syrup
1/4 cup of kirsch  plus 3 tbsp of kirsch (you could use brandy as well)
1/3 cup of sugar

chocolate shaving for decoration, 3 oz or so

Preheat oven to 350F
Grease and line two 9 cake pans 

Strain the jarred/canned cherries (reserve syrup) and soak them in a bowl with 1/4 cup of  kirsch while the preparing the cake

Sift together flour, salt and cacao powder and set aside.
Using the whisk attachment on our mixer, combine eggs, sugar and vanilla. 
Beat on high for 8-10 min. The mixture will triple in volume and will be quite thick. 
Turn down the speed to medium and add in the dry ingredients. Turn off the mixer as soon as you add  dry ingredients. Pour in the melted butter. Using a rubber spatula fold in the flour mixture and butter, using as few strokes as possible. Pour into cake pans, place on baking sheet and bake for 25-30 min, until cakes feel firm to the touch.
Let cool on rack.

While the cake is baking, pour the cherry syrup in a sauce pan, add sugar and bring to a boil. Reduce heat and simmer until reduced, about 10-15 min. Stir in the kirsch or brandy and set aside.

In a large bowl, whip the cream, icing sugar and vanilla over medium-high speed until it holds firm peaks. It should be smooth and firm. 

To assemble the cake...

Take your first cake layer and place it on a cake plate/stand.
Brush it liberally with the cherry syrup.
Using an offset spatula, smooth on about 1/2  inch of whipped cream. 
Nestle in the jarred/canned cherries that have been soaking in the kirsch, scattering them evenly.
Gently smooth over another 1/2 inch of whipped cream on top of the cherries.
Top with second cake layer. Brush liberally with cherry syrup. Spread a layer of whipping cream across the top and sides of the cake.
Sprinkle sides of cake with chocolate shavings and decorate the top with fresh or in my case frozen, but defrosted and drained cherries. 
Decorated as desired.


Wednesday, 18 February 2015

Southwest Quinoa

This a great and delicious option for a vegetarian meal or a side dish. It's hardy and delicious. Best of all it's super easy to prepare and still tastes wonderful the next day!  

1 cup of quinoa, rinsed
1 16-19oz can of black beans
1 16-19oz can of diced tomatoes
1 cup of frozen corn
1 cup of veggie or chicken stock
2 tbsp of olive oil
1-2 jalopeno peppers, seeded and finely diced
1 pablano pepper(or green pepper),finely diced
2 garlic cloves, minced
2 tsp of chili powder
1 tsp of cumin 
1 tsp of smoked paprika 
salt and pepper to taste
cilantro for garnish 
lime juice

Heat a  large, heavy bottom saute or frying pan over medium-high heat. 
Add the oil and saute the garlic, jalapenos and pablano pepper for 1-2 min until fragrant. 
Add in all the dried spices and fry for a minute, so that they release the oils.
Toss in the rest of the rest of the ingredients, bring to a boil. Reduce to a simmer, cover and cook for 20-25 minutes.
 
 Serve with fresh squeezed lime juice and cilantro or,
...this delicious and healthy creamy avocado sauce.
 

Creamy avocado and basil sauce with zoodle pasta

Once again...I love my spirilizer and zucchinis...so this is anther way to enjoy both. The creamy avocado, basil sauce is great! I had some fresh mint so added it as well, but it's not really required. The sauce goes great on top of eggs, or my Southwest Quinoa.

2 large zucchinis, spiralized
2 large ripe avocados, peeled and seeded
1/2 cup of fresh basil
1/4 cup of fresh mint (optional)
2-3 garlic cloves, depending on how garlicy you like it
1/3 cup of olive or avocado oil
pinch of cayenne pepper
3 tbsp of lemon juice
salt and pepper to taste

Add all the ingredients, but the olive oil, for the sauce in a food processor. Process  until combined and season with salt and pepper. 
 

 Slowly drizzle in the olive/avocado oil until emulsified.
If you prefer a warm pasta dish. Heat a pan over medium-high heat, add a table spoon olive oil take a head of garlic and crush/squish (I know, a very technical term) it with a knife and toss it in the oil. Toss in your zoodles and cook for 3-4 min. Discard garlic clove.
Toss the zoodles in with your creamy avocado sauce, add in some corn (optional) and devour :)