Monday, 14 December 2015

Sweet and Sticky Chicken


11/2-2 lbs of chicken thighs (I used boneless, skinless)
1/4 cup of soy sauce
1/3 cup of honey
1 tbsp of rice wine vinegar
4-5 tbsp of freshly squeezed lime juice (approx. two limes)
2 garlic cloves,  minced
1/4 tsp of dried chili flakes (optional)

Preheat oven to 400C.
Combine all of the above in a small sauce pan.  Bring to a boil and simmer for 4-5 min.  Take off the heat and set aside.
Pat dry the chicken thighs and line them close together in a pre-greased pan. Pour the sauce over them  and cook for 45 min  to 1 hour,  turning once half way through cooking.
Once done, serve with extra sauce drizzled over top and I added some toasted sesame seeds.

Sunday, 9 August 2015

Coconut Lime Curry Chicken with smoky roasted cauliflower

Lately I have been buying whole chickens and been butchering them myself. It's really quite straight forward and definitely more economical.  This way everyone gets their favourite part of the chicken too. I leave bone in, it is so much juicier, particularly  when barbecuing.  This is again a simple dish to prepare. The ingredients for the marinade/sauce get mixed into a bowl,  put your chicken pieces in a Ziploc bag and pour the marinade over the chicken. Seal the bag and let it sit for 40 minutes to 3 hours.

For the marinade..
2-3 tbsp of grape seed oil or coconut oil
1 cup of full fat canned coconut milk (my favourite brand is Aroy-D)
3 tbsp of honey
1 large lime, juice and ze
st
2 tbsp of soy sauce
1 tsp of cumin 
2 tsp of curry powder
1 tsp of salt
1/4 tsp of cayenne  pepper (optional)

11/2- 2lbs of chicken of your choice

lime and cilantro for garnish

Let's put it together.

Once you put the chicken on the grill or pan. Pour the remaining marinade into a small saucepan.
Bring to a full boil and boil for 4-5 min, reduce to a simmer and cook for an additional 3-5 min.
If you don't feel comfortable with this step just double the marinate and use half for the marinade and the other half for the sauce.  


Friday, 24 July 2015

Zucchini Noodle Pad Thai

If you like pad thai, you will love this dish. I was testing it out yesterday and wasn't sure how it will turn out so I didn't take pics along the way but it ended up being super delicious.  Compared to traditional pad thai, the ingredients for the sauce are much simpler and I bet ya you already have them in your fridge/pantry. The zucchini noodles held up great, but feel free to use regular rice noodles. I used shrimp, but you can also use chicken or both.  

What you will need...
3-4 servings

For the sauce
3 tbsp of all natural peanut butter (you could also use almond butter)
2 tbsp fish sauce
2 tbsp of honey
1 tbsp chili paste (you can use more if you like it spicy)
juice of a lime

Rest of ingredients
2 large zucchini (spirilized)
1 large carrot, julienned or spirilized
1 bell pepper, sliced into thin strips (you can use yellow, red or orange)
3 cup of bean sprouts
1 small onion or 2 shallots, chopped
3 garlic cloves, minced
1 tsp of fresh ginger, grated or minced
3 tbsp of coconut oil or oil of your choice
2 eggs, scrambled (I like to scramble the eggs separately, but feel free to do it as you cook the dish)
1 lbs of raw shrimp, peeled and deveined (I used medium size shrimp and that was about 31-40 shrimps)

Garnish
1/4 cup of chopped roasted peanuts (or cashews)
1/4 cup of chopped fresh cilantro
lime wedges

Let's prepare it..
In a microwave safe bowl, whisk together all the ingredients for the sauce and put in the microwave for about a min, just to warm it up;

In a large heave bottom pan or wok, heat up the oil over medium-high heat and add the onion, garlic and ginger. Stir-fry for about a minute;
Add  the shrimp and stir-fry for an additional 2 minutes, or until slightly pink;
Add in the carrots and peppers and cook for  about a minute;
Add scrambled eggs (or if you choose scramble in pan) and  half of the sauce; 
Toss in the zucchini noodles (or rice noodles) and bean sprouts and add the remaining sauce;
Toss and stir-fry until zoodles/noodles are tender and well incorporated with  the sauce, about 3-5 minutes;
Garnish with peanuts,  cilantro and lime wedges.


Wednesday, 8 July 2015

Basic Swiss Role Cake With Whipped Cream Filling

This is a prefect, not too sweet desert for mid afternoon. It may look a little complicated at first glance, but in fact it is very easy to make. Just follow the steps.


What you will need:

For the cake:

Vegetable oil, enough for greasing pan
5 large eggs
35g white flour
30g corn flour
80g white sugar
1 tsp vanilla extract

For the cream filling:
1.5 cups 35% heavy cream (you can replace it with your favorite jam as well)
1/4 cup white sugar
1 tsp vanilla extract
Grated chocolate for garnishing


How to make it:
Preheat the oven at 450F.

Line an approximately 30 by 25 cm tray with parchment paper and grease well.

In a large bowl add 2 whole eggs plus 3 egg yolks (save two of the egg whites in another bowl) and sugar. Using your electric mixer beat until light and creamy (about 5 min).

Add the flour mixture in 3-4 additions and mix well using a rubber spatula.


In another bowl, using an electric mixer beat the two egg whites until soft peaks form.

Add egg whites into flour mixture in 3 addition and stir well using a rubber spatula.


Pour the batter into the prepared tray and smooth it out evenly to the edges. Tap the tray few times on the counter top to get rid of any bubbles. Bake on the oven for 7-10 min or until the top is lightly golden and firm to touch (Avoid over baking otherwise the cake will get tender and hard to roll).

Take the tray out of the oven, and dust with powdered sugar.

Loosen the edges of the sponge cake with a knife and turn it out on a clean kitchen towel. Dust the the other side as well.

If desired, trim the edges to get a cleaner rectangle ( I just skipped this step).

Now, start rolling the sponge cake to form a log.


Set aside to get to room temperature, then put in the fridge for an hour or so to cool.

Meanwhile, start making your cream filling. Just remember it is very important to leave the cream in the refrigerator until you are ready to whip it.
Simply pour all the ingredients into a medium size bowl. Using your electric mixer start whipping on low speed and increase to medium. You want keep whisking until the cream starts up to take volume and the trails in the cream becomes stiff. If you took your whisk out of the cream and the whipped cream held firmly to the whisk then your whipped cream is ready. Refrigerate until ready to use.

Now, take the sponge cake out of the refrigerator and unroll. Spread 3/4 of the  whipped cream evenly  onto the cake, leaving about an inch from the edges. Then start rolling the sponge cake without the towel.

Spread the remaining cream filling all over the roll and garnish with grated chocolate if desired. Refrigerate until ready to serve.

Tuesday, 30 June 2015

Bulgarian stuffed peppers

This is a dish I grew up with and is traditional  Bulgarian dish. It has many regional variations, so no particular way is the "right way". I altered the original recipe a bit, in that instead of regular white, long grain rice (which you are more than welcome to use) I used quinoa, wild and brown rice.
You can use any peppers you desire. I prefer the long red peppers but couldn't find any, so I used cubanelle peppers. Also, I only had four peppers so ended up having a lot more of the filling, so I just spread it around the peppers in the pan. 

What you will need...
2 tbsp of olive oil
1 carrot, finely diced
1 medium onion, finely diced
1 celery rib, finely diced
2 cloves of garlic, minced
1 14 oz can of diced tomatoes
6 long red peppers, or cubanelle , tops removed, seeded and membranes cleaned out 
1 -1.5 lbs of lean ground beef
3/4-1 cup of rice (if using regular white rice, make sure you rinse it well)
I used 1/2 quinoa and 1/2 cup half wild and brown rice mix
1 tbsp of sweet paprika
2 tsp of dried summer savory (or oregano, if you don't have that on hand)
2 tbsp of fresh parsley, chopped 
1 tbsp of fresh dill, chopped (optional)
salt and pepper to taste

For the sauce:
4 tbsp of full fat yogurt (I use the balkan style, which is 6% milk fat)
1 tbsp of flour
2 eggs
a pinch  of paprika 
and 2-3 tbsp of the liquid from the cooked peppers
  
How to prepare it...
 In a large pan, over medium heat sautee the celery, onion, carrots and garlic until soft.
 Add in the rice,  gently fry it until it's translucent, if using white rice. If using quinoa, wild rice mix, cook for 2-3 min. 
 Add in the ground beef and fry until it is almost cooked through.
Stir in the diced tomatoes and cook about 5 min,  or until the rice starts absorbing the liquid.
Add in your spices/herbs and season with salt and pepper to taste.
Salt the inside of each pepper and stuff with ground beef/rice mixture.
Arrange in a pan. 
If you have any remaining mix, spread it around the peppers. Add in just just under a cup of water to the pan (usually the same amount of water  as rice).
 Bake in a preheated oven at 350F for 45-50 min.


Once your peppers are cooked. You can prepare the sauce.
In a cold sauce pan, mix together yogurt, and flour, beat in the eggs. Over low-medium heat, heat up the sauce until it comes to a gentle simmer, stirring continuously. Add in the juice from the cooked red peppers and season with salt. The sauce will thicken.


Monday, 4 May 2015

Walnut Frittata

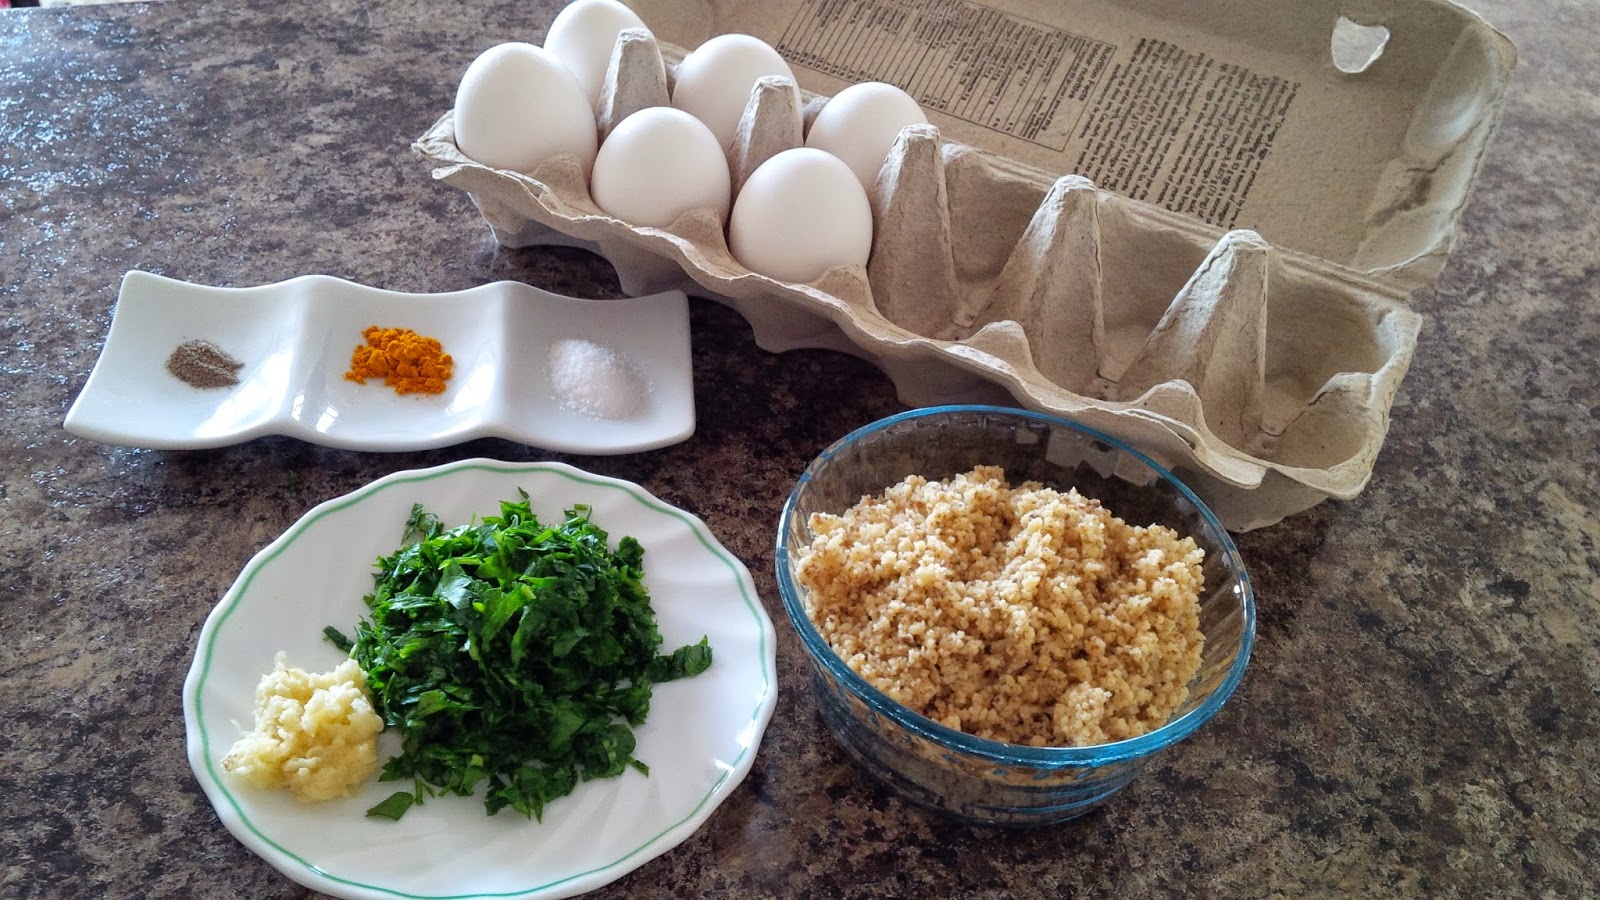
This nutritious, tasty, and extremely easy to make frittata is my choice when I am not sure what I should make for breakfast, lunch, or supper. Here are the ingredients that you will need:

6-7 eggs
1/2 cup ground walnut
3-4 tbsp finely chopped fresh parsley (or you can go with combination of fresh herbs such as cilantro, thyme, mint, basil,.. or don't add any, still tastes awesome)
2 cloves of garlic, minced
1/4 tsp turmeric powder
Salt and pepper to taste
3 tbsp olive oil or vegetable oil

Instructions:

In a medium sized bowl, mix walnut, chopped veggies, and  minced garlic. In another bowl, whisk the eggs.  Pour the eggs into the veggie mixture and  mix well using a fork.

Heat up 3 tbsp of olive oil or vegetable oil in a nonstick skillet. Make sure your oil is hot but not smoking. Swirl to coat evenly.

Stir the fritatta mixture and pour  into the pan. Cover the pan (very important if you want your frittata to puff up) and cook over low heat until one side is golden (about 10 min).

Shake the pan to make sure the frittata is not sticking. Turn the frittata, cover the pan again and let the other side to cook as well. Carefully slide the frittata onto a round platter. Cut into wedges and serve hot, warm, or at room temperature with a side salad.


Friday, 1 May 2015

Energy boost protein oatmeal raisin cookies


These cookies were a staple in my home years ago and I had forgotten about them until a few mornings ago when I was desperately craving oatmeal raisin cookies. Soft, chewy cookies are my weakness.I noticed that I had some over-ripe bananas on hand and decided to whip up this old favourite of mine. The cookie is versatile and depending on what you have in your pantry you can make it to suit your taste. I like to do a cocoa nibs or dark chocolate chips, dried unsweetened cherries with chocolate protein powder combination as well.

What you will need...

1 cup of oats 
1/2 cup of vanilla protein powder
3 ripe bananas, mashed
1/2 tsp of vanilla extract
1/2 tsp of cinnamon
2 tsp of chia seeds
1/4 cup of almond butter, or peanut butter (all natural)
1/4 cup of raisins (no sugar added)
1/4 cup of shredded unsweetened coconut
1/4 cup of walnuts (optional)

Preheat oven to 350°. Grease baking sheet, I use coconut oil spray. 

In a large bowl, combine rolled oats, shredded coconut, protein powder, chia seeds, cinnamon. In a separate bowl mix together mashed banana, vanilla and nut butter of your choice. Mix in your raisins and nuts.

 Pour wet ingredients over dry ingredients and stir until well combined.

I use a table spoon to portion them out.
Bake for 8-10 min.